Pages

Saturday, September 10, 2016

A long process

We all crave that quiet, well organised place to work or create in and if you have followed this blog, you will know that my work space has been out the back of the house in dark and dusty rooms that are cold in the winter, hot in the summer and frequently invaded by unwanted guests.
Well after a lot of persuading we have decided that a spare bedroom is completely unnecessary and I can have a room in the house, the fact that Steve is in need of more work space had no bearing on the decision I'm sure!
You may also be aware that we are in the process of the longest renovation ever undertaken by man, or women for that matter, but today, at last I feel like we are moving forward again.  We have had a junk room for more years than I care to remember,  it is like a black hole in the middle of the house. The door is always firmly shut and very few people have seen behind it. This afternoon, it's walls and floor were finally laid bare, not a bit of junk remained, it is a blank canvas, ready for transformation into ........ No...... Not. My work room, but our bedroom. This is going to be a very long process!


So in many months from now, hopefully this will be a smart new bedroom THEN the work can begin on my work room.  It is the only room in the house that needs completely gutting as it still has the old horsehair plaster walls and ceiling.
But it is a nice big room with a double window to let in lots of natural light, it will be fitted with good working lights and a ceiling fan, plenty of power points and won't be down the back, away from phones, running water and other necessities.

I has been been a very long time since I have posted to this blog and I'm not sure anyone visits anymore, but I will be posting weekly (she says optimistically) photos of the progress towards getting my ultimate work space.  If nothing else this will be a great way to track our very slow progress. 

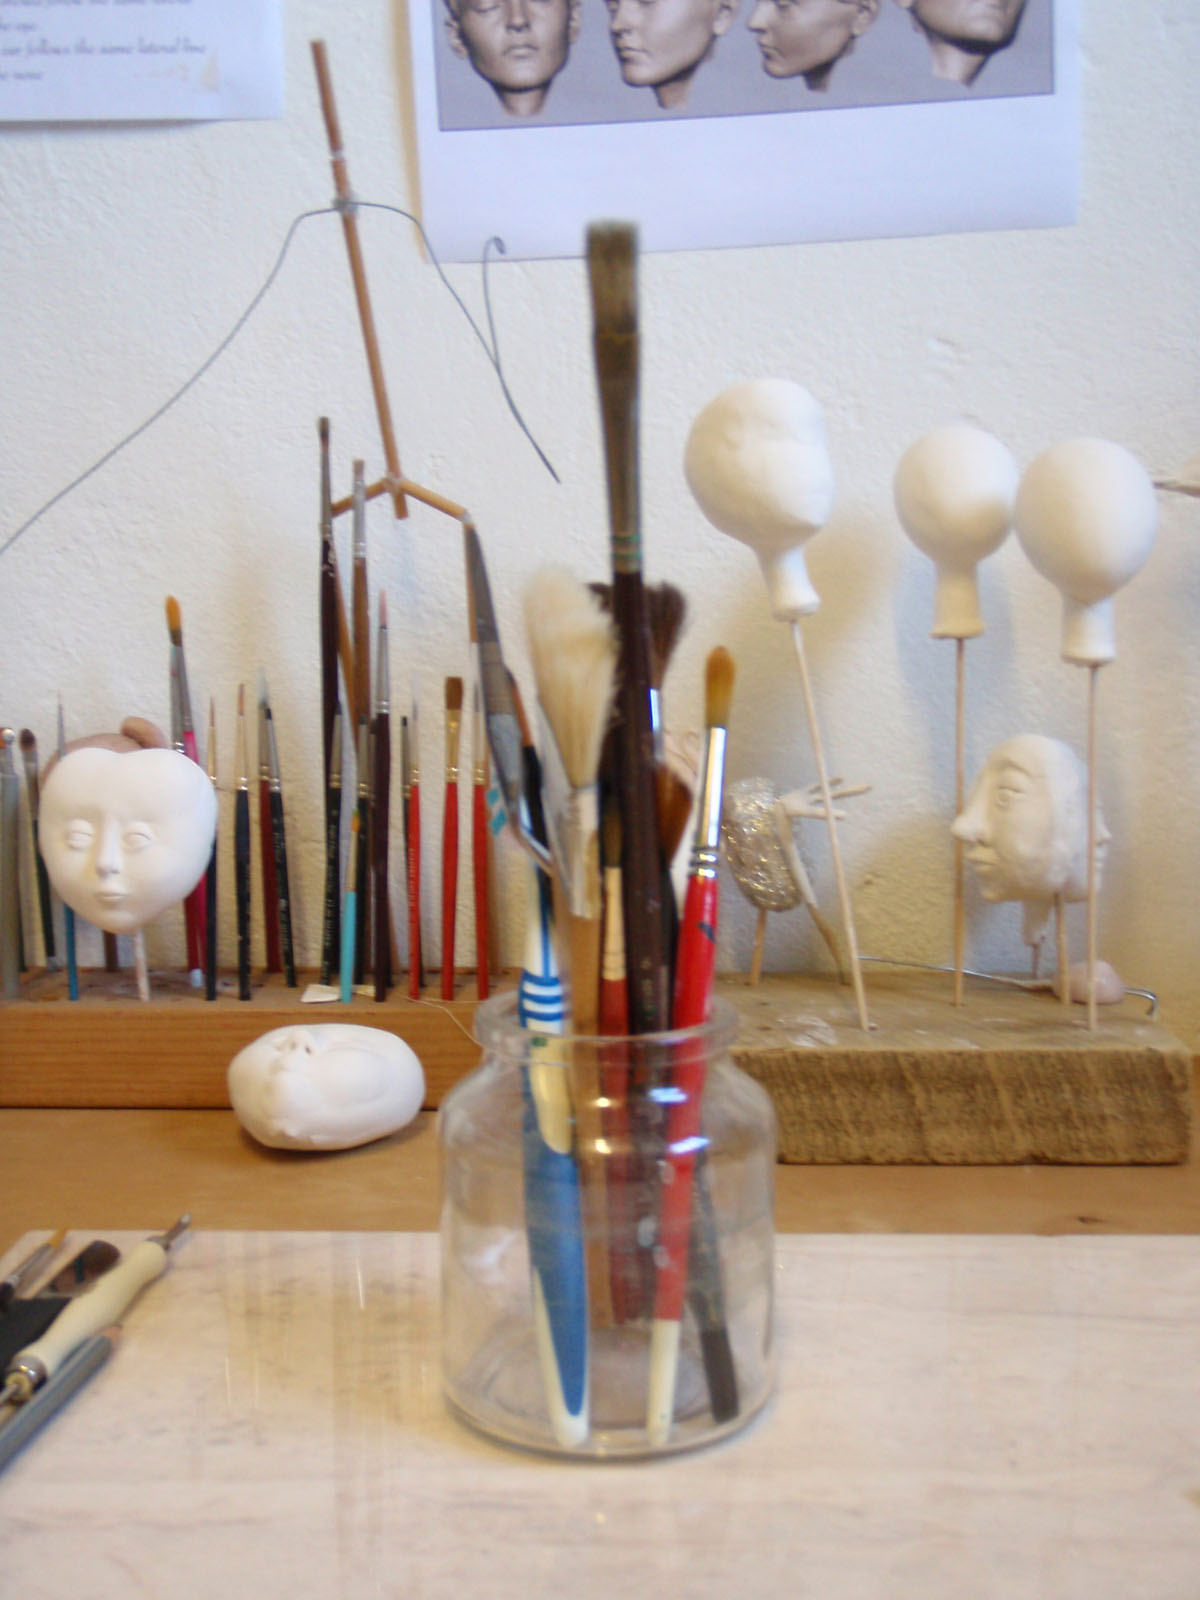
I had three things to do on my list today, luckily the other two involve sitting in front of the telly with either needles or a hook in hand and this colourful array of yarn, not finding storage for stuff that just can't be thrown or dust!


Sunday, June 26, 2016

Blogging from an ipad

Just how easy is it? Well here we go and maybe I will be blogging again soon

Friday, May 29, 2015

Latest Project

My latest project using my pile of fat quarters is this lovely pin cushion /thread catcher. A free pattern can be found here.
http://www.sewmamasew.com/media/…/SMSPincushionOrganizer.pdf
I now have a colourful collection to organise all my bits and pieces for my next sewing weekend away.
I still have quite a collection of fabric left, even a few whole fat quarters so if you have any suggestion for my next project, then post them here, or if you have something you want to see made up in hand dyed fabrics let me know and I will see what I can do.


Sunday, May 24, 2015

Quiltarama Project 2

Today project is made using Liz's Folio pattern
As you can see, there is a theme to my pieces and one big mistake in this piece but I can live with it. I am into recycling, up cycling at the moment so used a cornflakes box to line my folio. The machine had no problem stitching through this, but as we know, paper blunts your scissors, so you can assume it will do the same to your needle so use one that you are ready to replace, or keep a separate needle for the purpose.
All these pieces are made using the fabrics dyed in the pictures posted on 21st with the addition of a bit of stamping and decorative stitching. Don't forget to check out http://www.quiltarama.com.au if you would like to come along and dye up your own lovely pile of fabrics.


Friday, May 22, 2015

Project 1

First project from my fat quarter stash is this bag and zipper purse using the Monica Poole Bambino bag pattern, tweaked a bit to accommodate my fat quarters. I am quiet amazed at how far a pile of fat quarters will go!


Thursday, May 21, 2015

Quiltarama 2015

It is that time of year again and yes, I have been a very bad blogger as my last post was about this time last year!!
All the information for this years Quiltarama can be found at http://www.quiltarama.com.au/
This is going to be an exciting year, with a change of venue and more workshops on offer.
This year I am doing another dye workshop but focusing on colour theory.  All the details can be found on my tutors page http://www.quiltarama.com.au/tracy-mcnicoll/
As I have said over on the tutors page, I have set myself a challenge to use all the 21 fat quarters in a variety of small projects, which I will show you over the next few days.
For today, here are a couple of photos of the lovely colours that will be dyed up at the workshop.


I also have a facebook page, where I will be doing regular posts where you can add comments or ask questions. https://www.facebook.com/tracymcworkshops

You can also always message me here in blog land and ask too.

Wednesday, March 19, 2014

Quiltarama Work Shop

Quiltarma will be held on the 21st and 22nd of June
This year they are offering two day workshops and I will be doing a Dye N' Stamp wall hanging workshop in the CWA rooms.

Here is a sample.
You can down load all the workshop information here.

I hope to see you at a few of you in beautiful Dungog

Monday, May 13, 2013

Dyed Journal Covers.

I spent a lovely Saturday at Thorpes in Hunter Street presenting a dyed journal cover workshop.  The ladies dyed up some beautiful fabrics then added their own stamped designs. I love to see each individuals approach to using these stamps, the combinations and patterns they produce never cease to amaze me
 Here is the lovely Patricia waiting patiently while the dye does it thing.
You can find Patricia's blog here to read more about the day.


The vibrant fabric that came from the pots.


Then comes the fun but messy business of stamping.


Finally all those scrumptious pieces of fabric get cut up to make journal covers.


This is as far as we got on the day, far enough that they could be finished at home with some added embellishment if needed.


And here is Ceryll's finished journal cover

I must thank Cheryll for these photographs as I did not take a camera with me!
You can find her blog here, with lots to read and see.
Thank you to all the ladies that attended, I hope you had as much fun as I did.

Tuesday, April 30, 2013

A quick project using Goldens and Stuff

It has been hectic here and there are things I should be doing that aren't getting done but while having a coffee break the other day I came across this amazing person on you tube and after watching her mixed media bottle project thought "I have all that stuff out the back" so of course once the seed had been planted, I just had to go and have a try. 

 I have this old jar of brushes on my sculpting table which is a bit ordinary to say the least so this became my object for "the treatment"


I went looking for the mould I knew I had of the faces Rachel used, then thought, hang on I have a box of polymer clay bits with some faces I burnt earlier. There was also a pair of hands from a long abandoned project. The brain kept churning and I thought I might use some of the moulded paper pieces I have stashed away too and why not see what is left in the little blue box full of paper and card pieces from when I had my Cougar up and running for that brief period of time. So I ended up with the collection above and went about randomly chucking them at my pot.


Looks pretty ugly


Then the really fun part started when I added layers of different paints and medium.


Here is my finished pot, much more interesting than the empty coffee jar I started with.


All the different pieces really added some lovely texture.


And here is some of the "stuff" I used

You can watch the You tube video yourself and make sure you check out some of the wonderful things Rachel does. She also has a fascinating looking blog which I haven't had time to look at yet, that will have to wait for another day. Now I really must get back to the stuff I should be doing, my play time is over for now.

Friday, April 19, 2013

Printing from Carved Leather Blocks

Over the past couple of months both my work rooms have had a good clear out and revamp. One because of the acquisition of a sewing cabinet the other because of the presence of a well buried and extremely smelly dead furry thing. This second room has been used mainly for storage for a good long while and it was an enormous job clearing and sorting years of accumulated "stuff". But I have found things long lost and re discovered other things completely forgotten.
One of the things re discovered was a short paper I wrote on printing from carved leather blocks. I majored in printmaking at Uni and was asked to do this at the last minute as no one had used this technique before. I'm not saying it hasn't been done before, just not at this particular University, so here are some pictures of the carved leather blocks and the prints that resulted from them.

This was the first block I carved and as you can see from the prints below
could also be printed like a lino block.
To read more about the process go here


This is a large block so I can only show you what would fit on the scanner bed.
The prints below are of course reversed so you will see different parts of the block.
You will need to click on the pictures to see the full width as they will not show fully on the page.


No doubt you will recognise these characters inspired by a well know illustrator and author.
If you look at the three characters below you will notice that they are holding a brush, pick axe and print roller, the hierarchy of the art department.


Unfortunately I have one, not very good print left from these blocks.
Don't forget, you can go here to read more about printing from leather carvings.